Windows
Before you Install:
Check that you computer meets the minimum system requirements. If you followed the instructions for setting up Windows using UTM in either MacOS (Apple Silicon or Intel), you should be good to go. Be sure you are working within your Windows virtual machine for the following steps.
Install .NET SDK 6.0 (x64)
ArcGIS Pro requires .NET SDK 6.0 for x64 processors. The presence of Microsoft .NET Desktop Runtime 7 or for any other architecture is inconsequential.
Follow these instructions to install the correct .NET SDK.
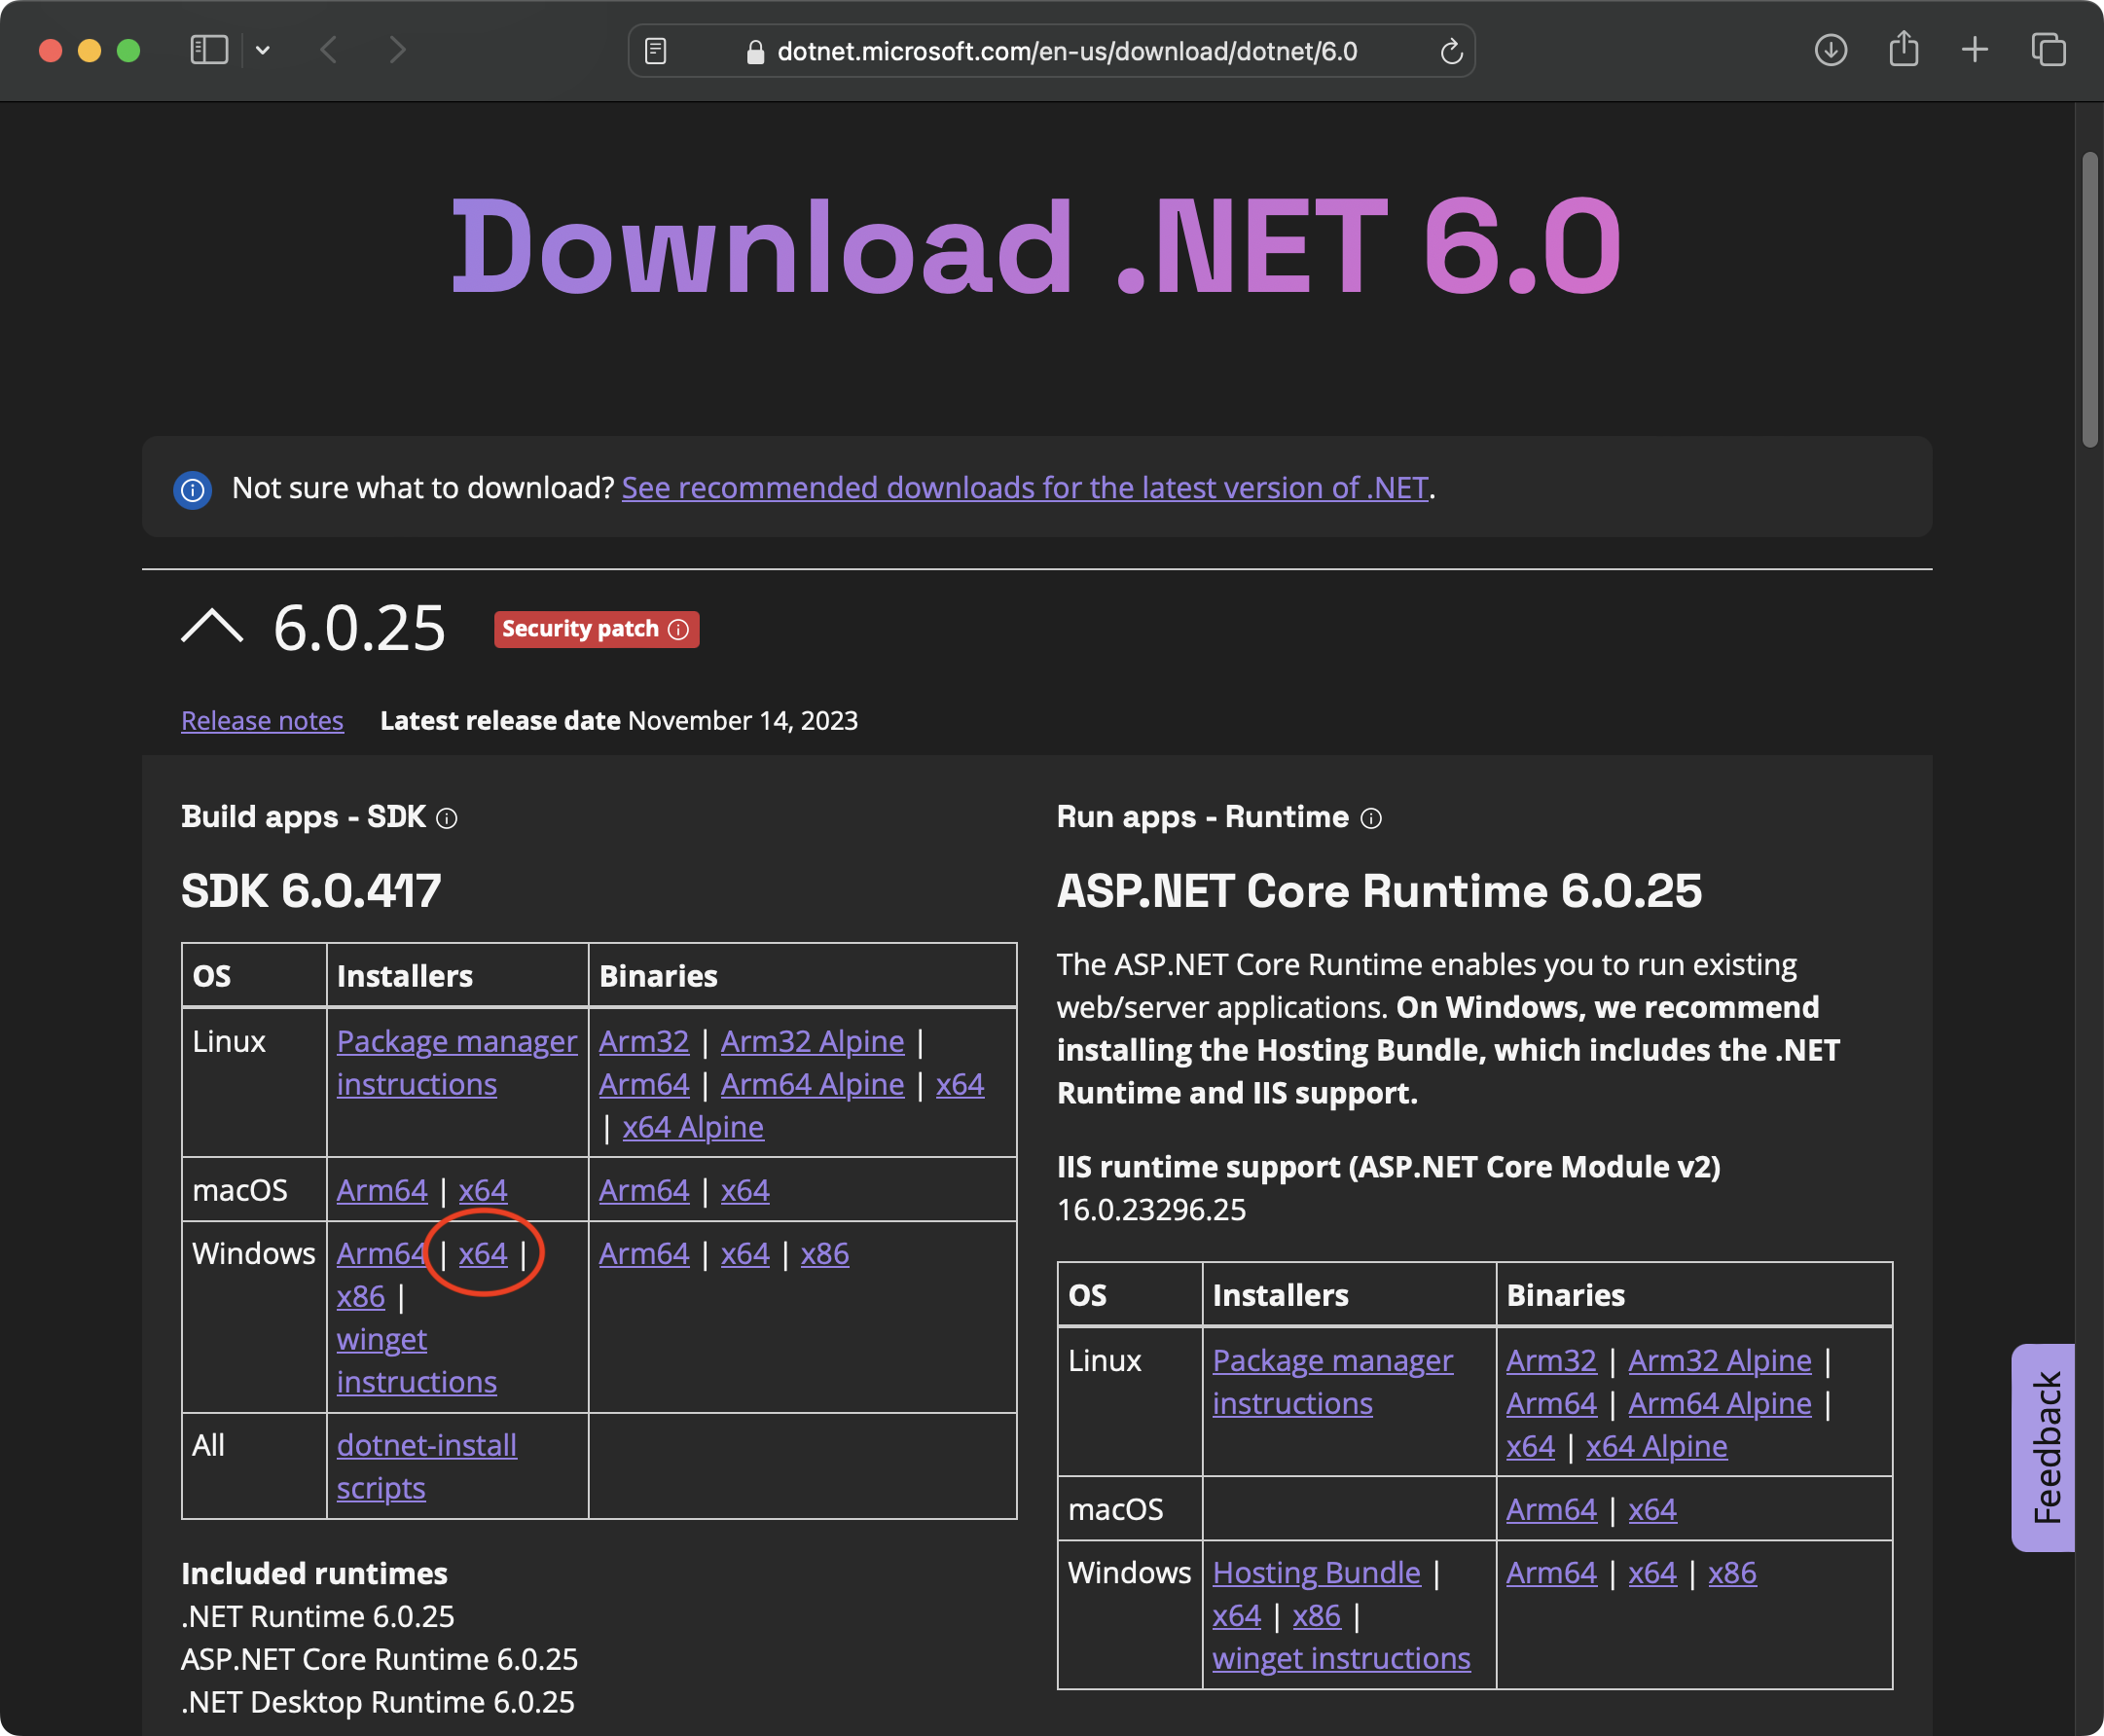
Open a browser and navigate to https://dotnet.microsoft.com/en-us/download/dotnet/6.0.
You will see a grid of options for installing the .NET SDK. Under the Installers column and Windows row, click the x64 link to begin the download.
Navigate to the downloaded file, and double click to begin the installation process. Follow the instructions in the installer, accepting all defaults.
Restart the Windows VM.
Install ArcGIS Pro
Download the ArcGIS Pro installer.
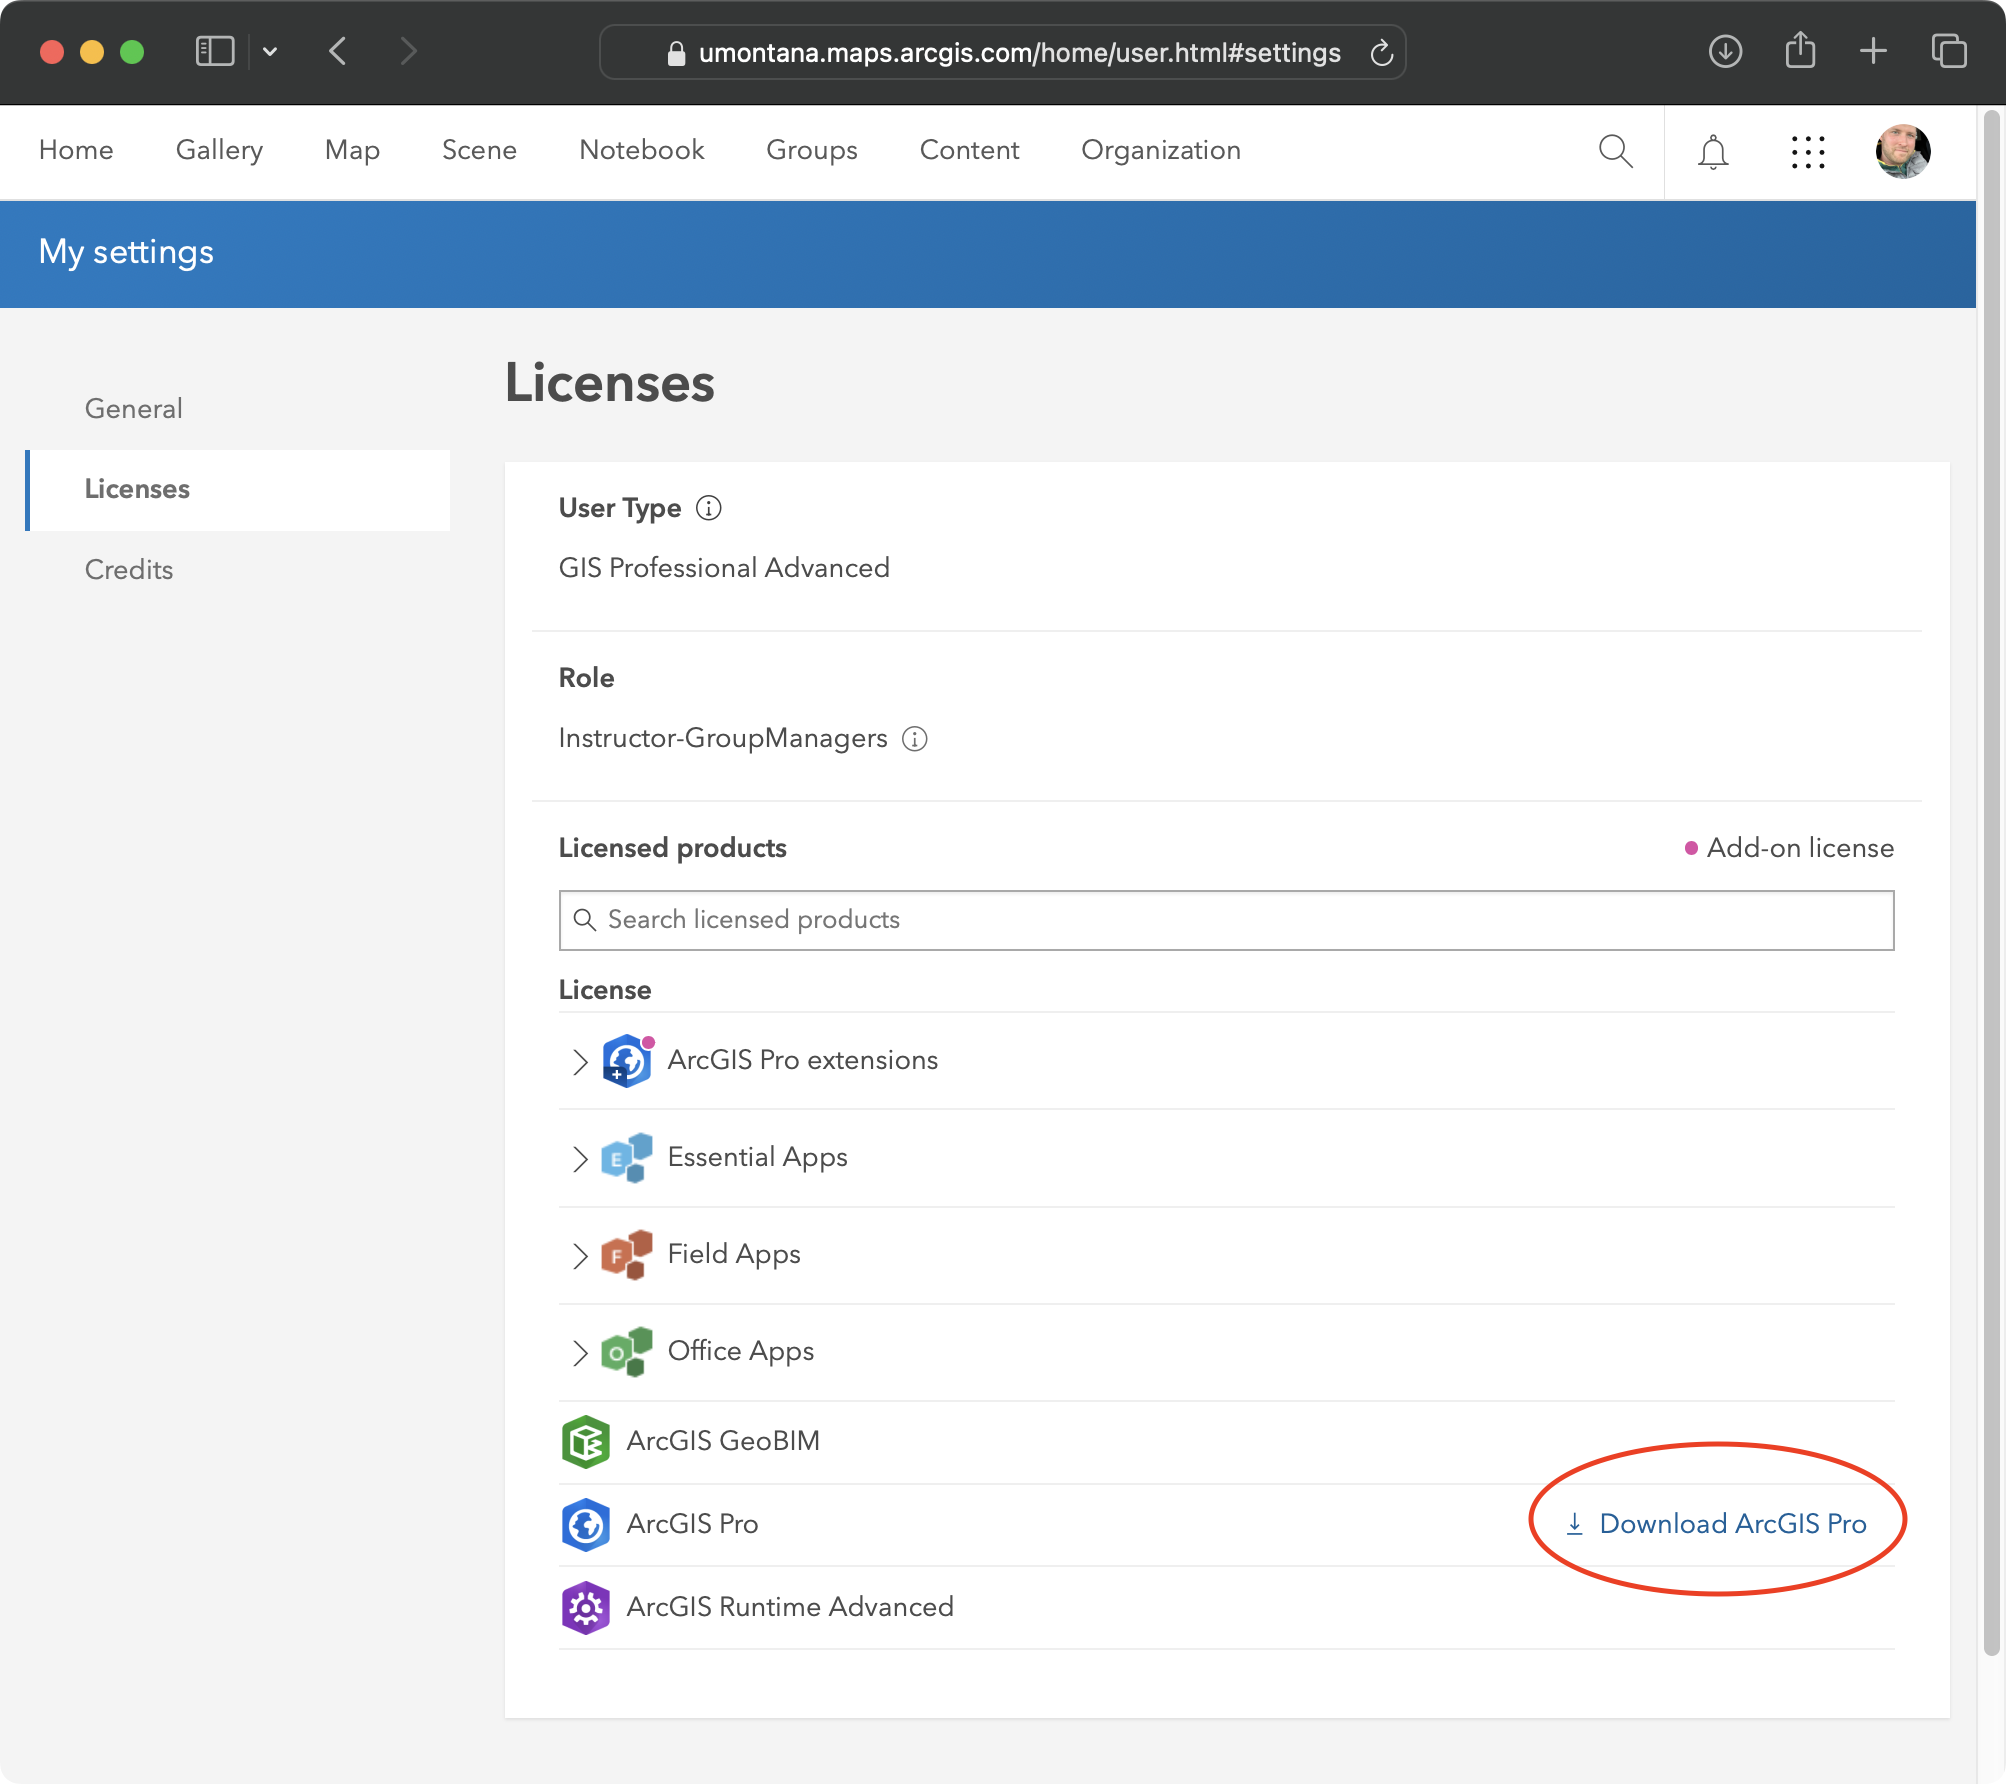
Navigate to https://umontana.maps.arcgis.com and click Sign In in the upper right. You will be prompted to sign in with your UM NetID.
Click your name in the upper right and go to My Settings > Licenses. On the list of product licenses, you’ll see a Download link for ArcGIS Pro. Click it to start the download.
Launch the downloaded installer, and follow the on-screen instructions to install ArcGIS Pro.
Activate ArcGIS Pro
Launch ArcGIS Pro.
At the sign on page, click Your Organization’s URL.
In the empty field, enter umontana so the URL completes to umontana.maps.arcgis.com.
Do not enter anything other than “umontana”. Anything else simply won’t work.
Click Continue, then click the UM NetID button.
Sign in with your NetID and password at the UM NetID SSO page. Activation should happen automatically.